Add Asset Form Asset Tab
Add the basic asset information for the asset at the Asset tab in the Add Asset form.
To reach the Add Asset form, go to the Assets Data page. To reach this page, select Assets > Assets Data. The Assets Data page appears.

To add an asset, select the Add icon  in the top right area of the page, above the grid. The Add Asset form appears.
Asset Number Field State
Depending on the Asset Auto-Numbering setting, the Asset Number field will be either in a locked state or an unlocked state when in Add mode.
- Unlocked State: When Asset Auto-Numbering is off for the division, the Asset Number field is unlocked. This is because you must enter an asset number in this field.
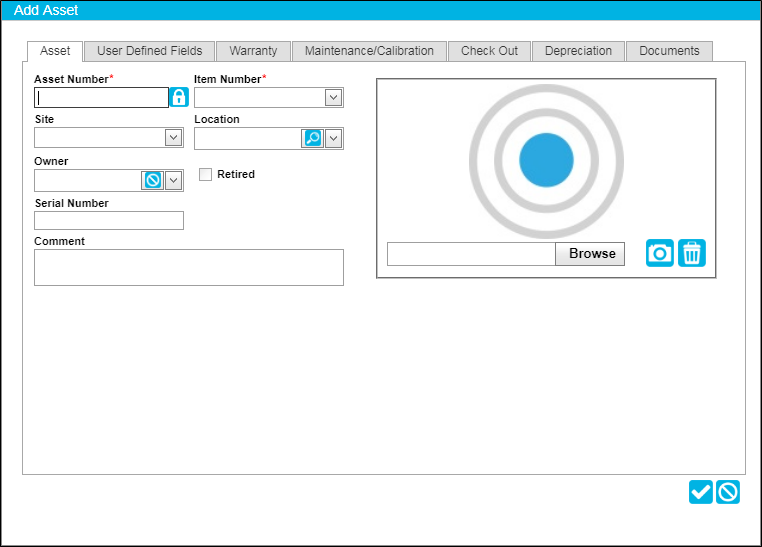
- Locked State: When Asset Auto-Numbering is on for the division, the Asset Number field is locked. This is because an asset number is automatically entered in this field.

Adding an Asset
The Asset tab is to the front. The main asset information is added to the asset at the Asset tab.
- Asset Number (required): if the division does not use Asset Auto-Numbering, this field will be blank. Enter the asset number in this field. The asset number must be unique within a division.
- If the division uses Asset Auto-Numbering, this field will be automatically populated by the system. You do not have to enter an asset number.
- Item Number (required): select the asset-type item number for this asset (see "Asset Type Item"). This asset will be associated with this item and all of its properties.
- Site (optional): to place the asset in a default location, select the site.
- Location (optional): select the site's location where the asset will reside. When an asset is placed in a site-location, the asset becomes part of the asset inventory.
Note: If your system uses containers, the Location field will contain a container control; for more information about using the container control, see "Container Control".
Important: The default location is the site-location where the asset resides when it is in the system. In order for asset operations to be performed on an asset (asset move, asset check out, asset reservation, asset maintenance order, and asset calibration order), the asset must be placed in a default location.
- Owner (optional): to associate an assignee with this asset, click the drop-down arrow in this field and select an assignee from the list that appears. For more information about assignees see "Assignees".
- Once added, you are able to change the assignee selection by selecting another assignee from the drop-down list.
- Once added, you are able to clear the assignee selection by selecting the
 Clear icon in this field.
- Retired Checkbox: when marked, this asset has been retired from IntelliTrack. The “Retire” function is used to remove check-out items from active status while keeping the asset in the system. When an asset is retired, no asset operations may be performed on the asset, including check out, check in, maintenance and calibration, and asset reservation (see "Retiring an Asset"). Please note that an asset can be placed back into active status (not retired) after it is retired. When unmarked, this asset is not retired. All asset operations may be performed on this asset.
- Serial Number (optional): enter the asset's serial number in this field, if applicable.
- RFID Tag Number (optional): when the asset item uses RFID, the RFID Tag Number field appears. The asset’s RFID tag number is entered in this field, if applicable.
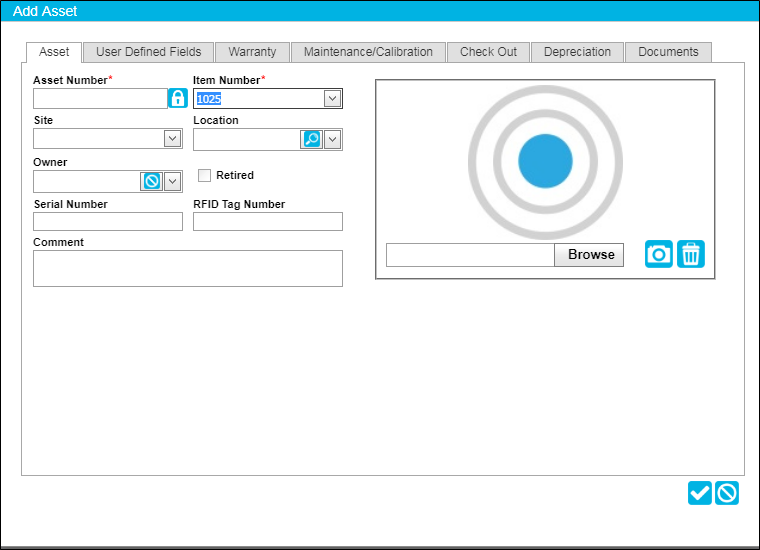
- Comment: enter a comment about the asset in this field, if applicable.
- Picture: A picture of the asset may be displayed in the Picture area of the form; see "Adding an Asset Picture".